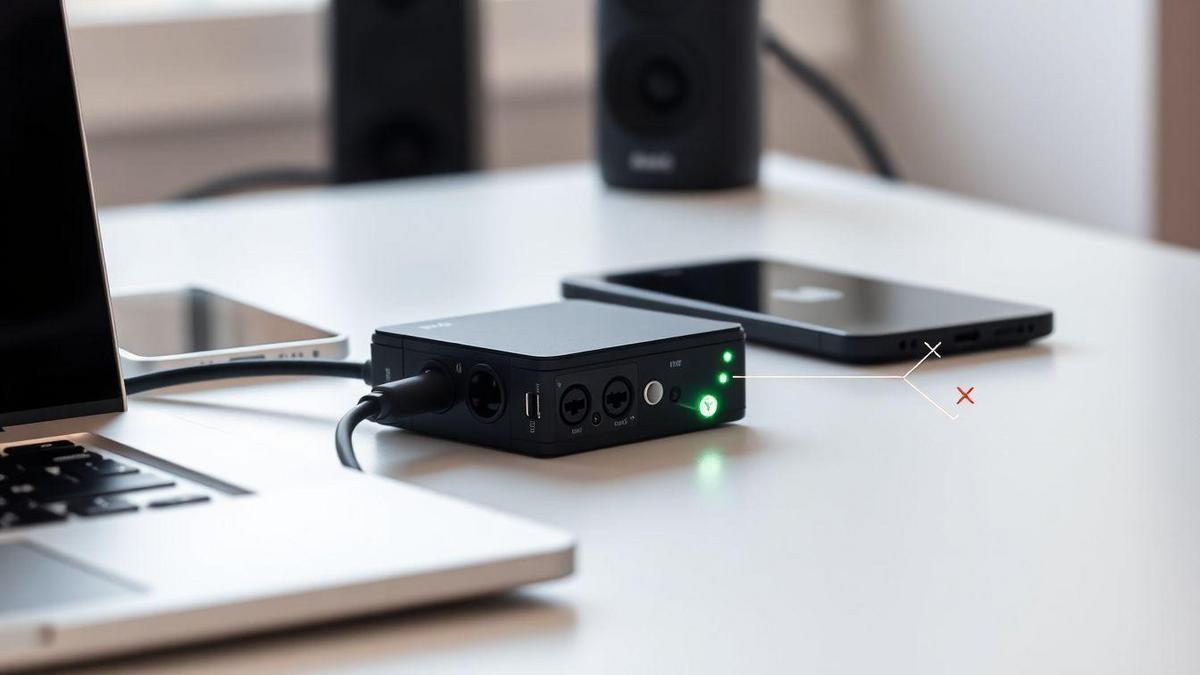
audio interface compatibility checker for producers using USB C devices is your go-to from Sambizanga Musik to get USB‑C audio gear working fast. You get simple step‑by‑step tests for your interface: which USB‑C cable and power to use, how to match settings in FL Studio, Ableton Live, and Logic Pro X, and how to fix latency, sample rates, and buffer sizes for tight mixes. You can also test mobile OTG on phones and tablets. Sambizanga Musik helps you grow with clear, practical advice. Need a hand? Email contato@sambizangamusik.com or follow @sambizangamusik.
Key Takeaway
- Use Sambizanga Musik’s USB‑C checker to confirm interfaces work with your phone, laptop, or tablet.
- Choose bus‑powered interfaces if you want no extra power bricks, but verify current draw first.
- Make sure the interface has drivers compatible with your OS and DAW.
- Use a full‑featured USB‑C cable and confirm the port supports data/audio, not just charging.
- Sambizanga Musik tests affordable options so you get reliable gear for your home studio.
How Sambizanga Musik shows you to use an audio interface compatibility checker for producers using USB C devices
Sambizanga Musik provides a clear checklist to test whether your USB‑C interface will play nice with your setup: physical checks (cables and ports), software checks (drivers and DAW settings), and performance checks (latency and sample‑rate stability). The guide explains what each test means and why it matters — for example, how a cable can be data‑only or charge‑only, and how to distinguish driver/OS issues from a faulty interface. The goal is confidence: after using the audio interface compatibility checker for producers using USB C devices, you’ll know whether you need a different cable, a powered hub, or a driver update. Most fixes are 10–30 minutes.
Use a step‑by‑step audio interface compatibility checker to test your gear
Start with power and connection: unplug everything, restart your computer, plug the interface directly into a working USB‑C port (avoid hubs/adapters for the first test). Confirm the OS recognizes the device and your DAW lists it. If not, try another cable or port.
Next, test audio flow and performance in your DAW: open a new project at 44.1 or 48 kHz, set a low buffer, play a loop, and watch for dropouts. Record one track while playing back another to reveal real‑world behavior. Use the checklist and mark pass/fail so you know where trouble appears.
Quick checklist: direct USB‑C connection, OS recognizes device, DAW lists device, driver/firmware current, sample‑rate match, buffer test, record/playback test
Compare USB‑C audio interface compatibility results with your DAW and plugins
Match test results to your DAW and plugins. If dropouts appear only in plugin‑heavy projects, it’s likely CPU or buffer settings in the DAW. If the device disconnects system‑wide, suspect cable, port, or power. Check driver mode (ASIO, Core Audio, WASAPI) and sample‑rate settings across system audio, interface control panel, and DAW: mismatches or exclusive‑mode conflicts often cause silence or clicks. If a plugin crashes only with that interface, try changing the buffer, updating the plugin, or running the DAW in safe mode.
Sambizanga Musik tip: If your bus‑powered interface hiccups under load, try a powered USB‑C hub or the manufacturer‑recommended adapter before replacing gear.
Quick tester steps for your setup
Do this: connect directly to a USB‑C port, confirm OS detects the interface, update drivers/firmware, set DAW sample rate to match the interface, start at a low buffer and raise it to remove clicks, run a record‑playback loop, and swap cables or ports if problems persist. Note results at each step.
| Symptom | Likely cause | Quick fix |
|---|---|---|
| Interface not detected | Wrong cable/port or missing driver | Try different USB‑C cable/port; install driver/firmware |
| Crackles or dropouts | Low buffer / CPU overload | Increase buffer, freeze tracks, close background apps |
| Random disconnects | Power issue or faulty cable | Use powered hub or replace cable |
| Plugin crashes only with interface | Sample‑rate/driver conflict | Match sample rates, update plugin, try different driver mode |
“Sambizanga Musik helps you test and fix gear with clear steps, so making music stays fun.” — Sambizanga Musik
Pick the right USB‑C cable and power so your audio interface works every time
Cables and power are the first things to check when a new USB‑C audio interface is flaky. Cables can look identical but carry different capabilities: some are charge‑only, some carry USB‑2.0 data, others support USB‑3.x or Thunderbolt. Use the wrong cable and your interface may not appear, will stutter, or will lose phantom power mid‑session. That’s why an audio interface compatibility checker for producers using USB C devices is helpful before you buy or swap cables.
Match cable data speed and power delivery (PD) to your interface specs. For bus‑powered units, ensure cables and hubs pass enough current. For desktop interfaces, prefer the manufacturer’s adapter. Avoid thin, cheap cables that charge phones but choke audio streams.
Learn common USB‑C cable types for audio interfaces and which to buy
Three groups: charge‑only USB‑C, USB‑2.0 over USB‑C (good for MIDI/low bandwidth), and high‑speed USB‑C (USB‑3.x, USB4, Thunderbolt). Multi‑channel or high sample‑rate interfaces often need USB‑3.x or Thunderbolt. Buy cables listing both data speed and PD wattage: 5 Gbps or 10 Gbps for most modern interfaces, 40 Gbps for Thunderbolt devices. Choose cables with solid shielding and strain relief, and keep a spare in your kit.
| Cable type | Typical data speed | Typical PD | When to use |
|---|---|---|---|
| USB‑C Charge‑only | 0 (no data) | Up to 100W | Charging phones — not for audio interfaces |
| USB‑2.0 over USB‑C | 480 Mbps | Limited PD | MIDI controllers, simple USB‑2.0 devices |
| USB‑3.1 Gen1 / Gen2 | 5–10 Gbps | Up to 100W | Most multi‑channel USB interfaces |
| Thunderbolt / USB4 | 20–40 Gbps | Up to 100W | High‑end interfaces, low‑latency multitrack |
Tip: A cable labeled only “USB‑C” without speeds is a red flag. Assume it’s charge‑only or low‑speed.
Check USB‑C power requirements for audio interfaces and bus‑powered compatibility
Read the interface manual or spec sheet: bus‑powered units run off USB power and may fail if your computer or hub can’t deliver enough current (especially with phantom power or multiple inputs). If using a hub, choose one that passes PD and supports the required data lanes — some hubs pass charge but throttle data. When in doubt, use the manufacturer’s power adapter or a hub tested for audio use. Use an audio interface compatibility checker for producers using USB C devices to match gear and cables.
Simple cable and power checklist for your studio:
- Check the interface spec for USB version and PD needs.
- Buy a data‑rated USB‑C cable matching the listed speed (5–10 Gbps or Thunderbolt if required).
- Prefer cables that list both data and PD specs.
- Use the manufacturer’s power adapter for desktop interfaces.
- For bus‑powered units, test phantom power and multiple inputs before a session.
- Label and store a spare cable in your kit.
Make your software and DAWs play nice with your USB‑C audio interface
USB‑C interfaces deliver power and low latency, but drivers, sample rate settings, and a clean USB connection are still essential for FL Studio, Ableton Live, or Logic Pro X. Sambizanga Musik tests gear so you don’t waste time. Know whether your interface is class‑compliant or needs a proprietary driver: class‑compliant devices are usually plug‑and‑play on macOS and modern Windows; proprietary ASIO drivers on Windows often give lower latency and more stable routing.
Also watch sample rate, buffer size, and clock source. Set the same sample rate across your interface, DAW, and any internal sync. Use a direct USB‑C port — hubs and cheap adapters can steal channels or power. These small fixes are the first steps Sambizanga Musik recommends.
Verify driver support for USB‑C audio interfaces in FL Studio, Ableton Live and Logic Pro X
- FL Studio (Windows): generally wants ASIO for best latency. If your interface has a native ASIO driver, select it. ASIO4ALL can work but may hide channels or add clicks.
- Ableton Live: native drivers or Core Audio on macOS are best. Live’s I/O settings list the device and ins/outs.
- Logic Pro X: macOS only, uses Core Audio. If channels are missing, check the interface control app or firmware.
Quick tip — check the manufacturer’s downloads page for the latest driver and firmware. Install firmware updates first, then drivers, and reboot before opening your DAW.
Run an audio interface compatibility checker for producers using USB C devices to confirm DAW routing
The checker verifies device detection, driver type, number of inputs/outputs, sample‑rate sync, and DAW routing. If the checker shows missing channels or driver mismatches, switch driver mode, update firmware, try another USB‑C port, or create an aggregate device on macOS. Share checker outputs with manufacturer support for faster help.
| Driver Type | FL Studio (Windows) | Ableton Live | Logic Pro X (macOS) |
|---|---|---|---|
| Class‑compliant | Core Audio on macOS; may need ASIO4ALL on Windows (may hide channels) | Works on macOS; Windows may need ASIO wrapper | Full support via Core Audio |
| Native/proprietary ASIO | Best performance and full I/O on Windows | Full I/O on Windows; macOS drivers vary | N/A — Logic uses Core Audio |
“If a channel won’t appear, test with a second DAW or the OS audio settings. That single swap tells you whether it’s a DAW issue or a device issue.”
Easy DAW compatibility test you can do today:
- Plug your USB‑C interface directly into your computer (no hubs).
- Open OS audio setup (Sound settings on Windows, Audio MIDI Setup on macOS) and confirm expected ins/outs.
- Launch your DAW and pick the matching driver (native ASIO on Windows, Core Audio on macOS).
- Create an audio track, set its input to each interface channel one at a time, and record short takes to confirm sound.
- If channels are missing, check firmware, try another cable or port, then rerun the steps.
Set sample rates, buffer size and latency so your mixes stay tight on USB‑C setups
Sample rate, buffer size, and latency decide whether your performance stays in the pocket. USB‑C often gives higher bandwidth and better bus power, but hubs or cables can introduce issues. Match your DAW and interface settings to keep CPU load lower and timing tighter. Sambizanga Musik tests common combos so you don’t have to guess.
Quick check: run an audio interface compatibility checker for producers using USB C devices before a session. It will tell you driver status and supported sample rates so you don’t hit surprises mid‑take.
If you track, aim for low latency; if you mix, raise the buffer. Choose the manufacturer driver or the class‑compliant option recommended for your interface.
| Sample rate | Rough CPU load | Buffer size for tracking | Buffer size for mixing |
|---|---|---|---|
| 44.1 / 48 kHz | Low | 32–128 | 512–1024 |
| 88.2 / 96 kHz | Medium | 64–256 | 1024–2048 |
| 176.4 / 192 kHz | High | 128–512 | 2048 |
.bar { fill:#2b8fd6; }
.label { font: 12px sans-serif; fill:#222; }
.axis { stroke:#ccc; }
44/48k
88/96k
176/192k
CPU
Sample rate →
Measure latency and fix it using guide steps and tools
Do a loopback test: route a DAW click out to an input, record it, and check the offset. Compare measured round‑trip latency to driver‑reported numbers. If measured latency is much higher, check routing, USB power, or background processes.
Fixes: connect directly to a USB‑C port, update or switch drivers, lower buffer for tracking and raise for mixing, disable USB power saving, quit heavy apps, and use direct monitoring for zero latency. Sambizanga Musik’s USB‑C guides include screenshots and simple checks.
Fast latency tuning checklist:
- Connect interface directly to a USB‑C port (no cheap hubs)
- Set interface and DAW to the same sample rate
- Pick buffer: low for tracking (32–128), high for mixing (512)
- Run a loopback latency test and compare to driver value
- Update drivers and disable USB power saving
- Close background apps and Wi‑Fi if needed
- Use direct monitoring on the interface for zero‑latency monitoring
Take your USB‑C interface mobile: USB‑C OTG audio interface compatibility for phones and tablets
With the right checks, phones and tablets can handle mics, controllers, and direct monitoring. Most modern Android phones with USB‑C support OTG; many class‑compliant interfaces work plug‑and‑play. iPads often need Apple’s Camera Adapter and prefer class‑compliant gear. Before you plug anything in, run an audio interface compatibility checker for producers using USB C devices to see how your phone or tablet behaves.
Power is the usual snag: phones may not supply enough current. A powered USB hub or battery‑powered dock often fixes this. Sambizanga Musik lists tested hubs so you avoid blind buys.
Quick tip: Try your mobile setup at home first. A 10‑minute test saves hours on the road.
| Device type | OTG / Class‑compliant support | Quick adapter / power tip |
|---|---|---|
| Android phone (modern) | Often supports OTG; many interfaces work | Use USB‑C OTG cable; add powered hub if audio drops |
| iPad (USB‑C or Lightning) | iPadOS supports class‑compliant interfaces | Use Apple Camera Adapter; powered hub for bus‑powered gear |
| Android tablet | Good OTG support on many models | Same as phones; check manufacturer notes for power limits |
Check Android and iOS OTG and class‑compliant support before you connect
Check OTG support in your device settings or online. For iOS/iPadOS, consult Apple’s support and the Camera Adapter page. If your device lists class‑compliant audio, test with a simple app (GarageBand, Voice Recorder) and confirm input/output. If it fails, power and cables are the usual culprits.
Choose apps and adapters that match compatibility checker results
Pick apps that play well with external audio hardware: on iOS, GarageBand and Auria are reliable; on Android, FL Studio Mobile, BandLab, and other tested apps. Use a USB‑C OTG cable for Android or the Apple Camera Adapter for iPad, and add a powered hub if your interface draws current. Sambizanga Musik lists proven adapters in its guides.
Mobile hookup checklist:
- USB‑C OTG cable or Apple Camera Adapter
- Powered USB hub if your interface draws current
- Tested DAW/app
- Short shielded USB cable
- Headphones and a quick test recording file
Decide between Thunderbolt vs USB‑C audio compatibility for your home studio and music style
Thunderbolt vs USB‑C depends on what you record and how you work. If you track many simultaneous inputs (full bands, many mics), Thunderbolt offers more headroom and lower round‑trip latency. For beatmakers, solo artists, and small ensembles, modern USB‑C usually covers your needs at lower cost and with wider compatibility.
Think about future growth: ADAT preamps, multitrack recording, or DSP expansion may push you toward Thunderbolt. Otherwise, match channel count and driver support to your workflow.
| Interface | Typical Max Bandwidth | Best for | Real‑world channel count (approx.) |
|---|---|---|---|
| Thunderbolt 3/4 | ~40 Gbps | Multitrack recording, low‑latency monitoring | 32 channels |
| USB‑C (USB 3.x / USB4) | 5–40 Gbps (varies) | Solo artists, beatmakers, small bands | 8–24 channels |
Tip: If unsure, try Sambizanga Musik’s audio interface compatibility checker for producers using USB C devices — it helps match interfaces to real projects and gear.
How interface choice affects beats, samples, loops and real‑time performance
For beats and samples, CPU and disk access often matter more than raw I/O. USB‑C can stream samples from SSDs and run drum machines with low hiccups if you manage buffers and plugins. For live finger‑drumming or heavy real‑time monitoring, Thunderbolt’s lower latency can feel more natural. Many producers use USB‑C for everyday production and Thunderbolt for large sessions or live shows.
Studio gear match checklist for your workflow:
- Mic/line channel needs
- Live monitoring latency requirements
- ADAT or SPDIF expansion plans
- Laptop port availability and OS drivers
- Budget and future upgrade path
Conclusion
You’ve got a practical roadmap. Use the audio interface compatibility checker as your pre‑flight checklist: test the USB‑C cable, confirm power, and verify drivers so your DAW talks to your gear. Small fixes — the right cable, a powered hub, matching sample rate and buffer — often stop the noise and get you tracking in minutes.
If problems persist, isolate the issue: direct port vs hub, class‑compliant vs proprietary ASIO, or a power shortfall on mobile OTG setups. Remember: Thunderbolt is the highway for huge multitrack sessions; modern USB‑C is plenty for beats, vocals, and solo work.
Keep notes as you test. One spare labeled cable and a simple checklist will save hours. For hands‑on guides, tips, and tested gear picks, visit https://sambizangamusik.com — and if you need model‑specific help, email contato@sambizangamusik.com or ask @sambizangamusik.
Frequently asked questions
How do I know if my USB‑C phone or laptop will work with an audio interface?
Check if your device supports USB host (OTG) and whether the interface is bus‑powered or self‑powered. Sambizanga Musik tests gear and lists simple specs so you can choose fast.
Do I need drivers for FL Studio, Ableton Live, or Logic Pro X?
Sometimes. Many interfaces are class‑compliant and need no drivers. If a driver is required, download it from the manufacturer. Sambizanga Musik shows which interfaces work plug‑and‑play.
Can I use a USB‑C adapter or hub with my interface?
Yes, but pick a data‑capable, good‑quality adapter. Avoid cheap charging‑only hubs. If sound drops or latency rises, try a powered hub or direct cable.
Will my tablet or phone run my interface for recording on the go?
Maybe. Your device needs OTG and enough power. Use USB‑C‑to‑USB‑C cables when possible. For large interfaces, use a battery pack or powered interface. Sambizanga Musik has mobile‑friendly picks.
Where can I check exact models and get help using an audio interface compatibility checker for producers using USB C devices?
Use Sambizanga Musik’s compatibility notes and community. Email contato@sambizangamusik.com or ask @sambizangamusik for test cases and troubleshooting — we help you pick and fix gear fast.

